Microsoft Access Documentation
Many of the files on this site are too large for Microsoft Excel to import. Here is how to use Microsoft Access to view them. It's a far more suitable tool for whatever it is you're likely to be doing too (there's very few good purposes for excel to be needing to handle several hundred thousand lines of data where access wouldn't be a better fit). Here's how to import it, step by step.
Note your version of access may look different. It's equally suitable to use your version, and the steps are likely to be similar no matter what version you're using. I am using Office XP Professional in this example. If yours looks different, look for options similar to what I list here.
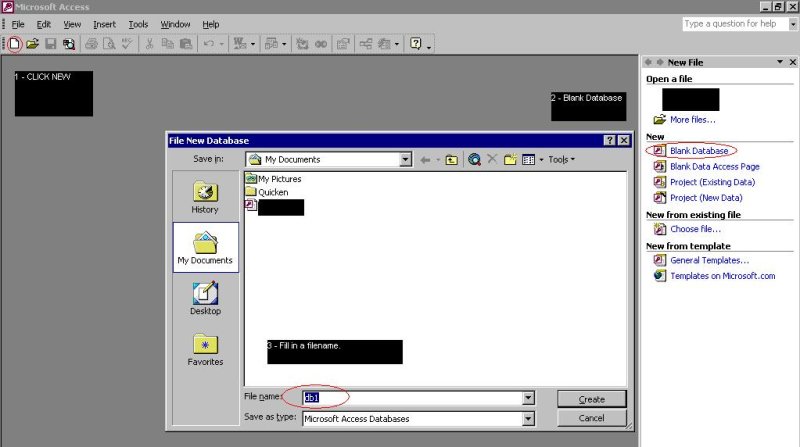
- Click the new button on the toolbar. It's a sheet of blank white paper.
- Select Blank Database on the left.
- Enter a filename for this new database.
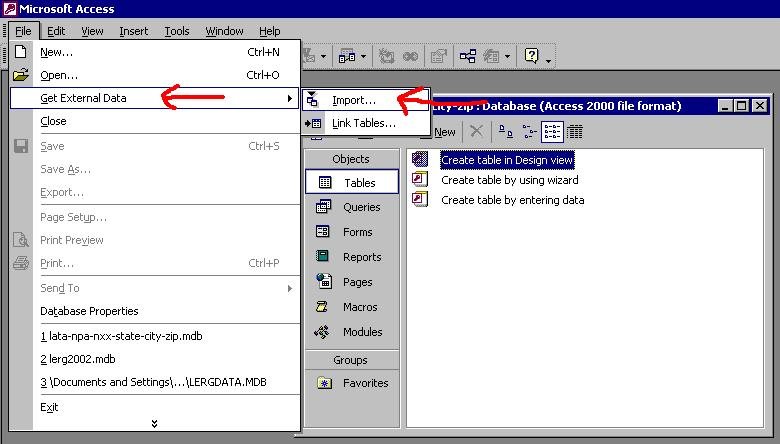
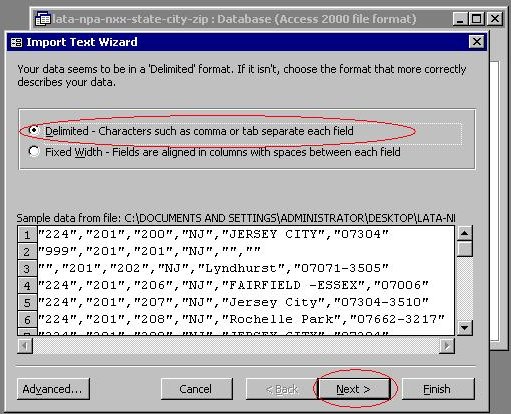
- Choose File, then Get External Data, then Import
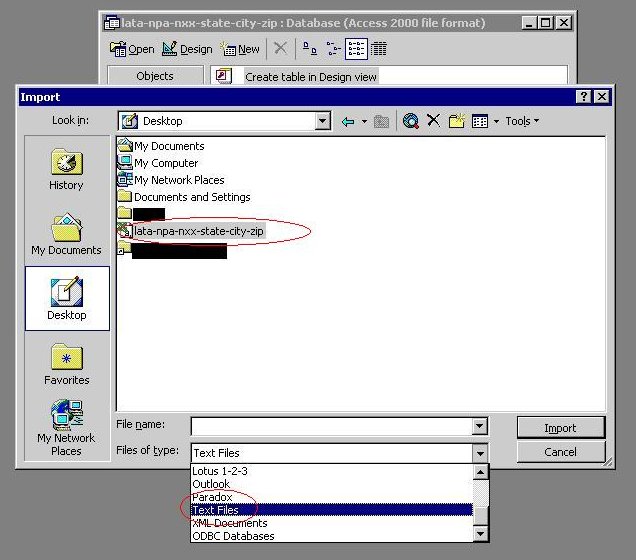
- In the dropdown titled "Files of type", select "Text Files". The file you've downloaded earlier from telcodata.us should appear if you are in the directory you saved it in. If you are not, navigate to that directory in the normal fashion.
- In the next screen, select "Delimited"
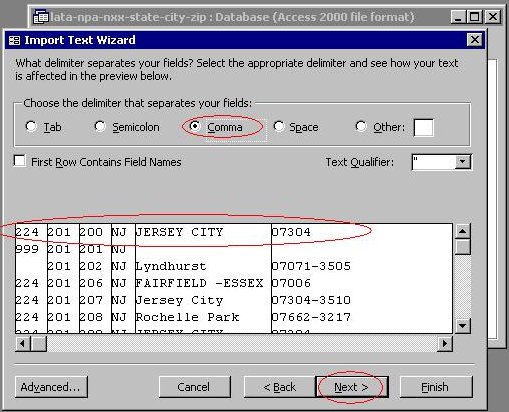
- In the next screen, select "Comma". (There are tab seperated files on the site as well. Read the comments by the file on the site if you are unclear as to which format it is in.) Note that you should see the file seperated properly by lines in this screen if you chose the delimiter properly.
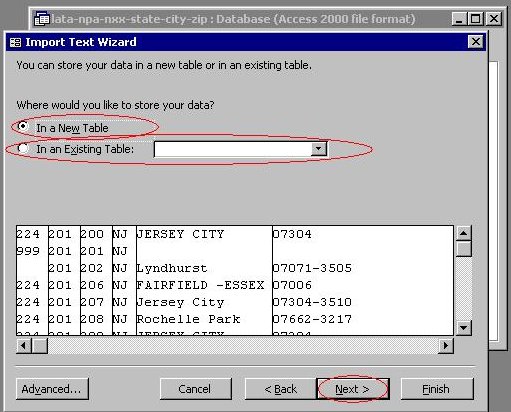
- You can select in a new table if you created a new file, or "In an existing table" if you are adding on to a database with identical format. 99.999% of the time, "New Table" is the answer.
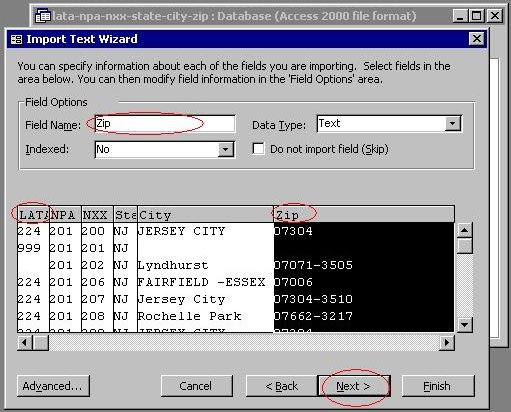
- Click on each field, and you can change the field name. If you don't know what the fields represent, the description on the download site almost always tells you. Usually the files are named in an obvious way, as well, so you can also look at the filename for hints.
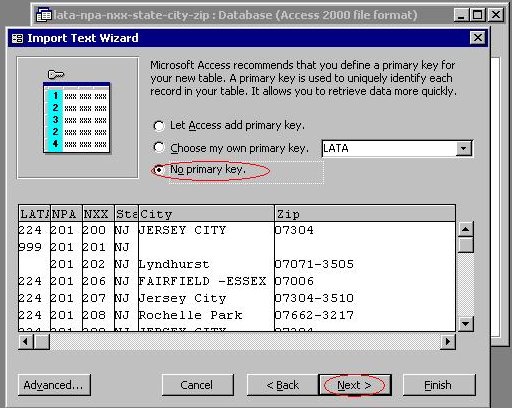
- Generally there's no point to assigning a primary key here. Unless you know what you are doing, answer "No Primary Key".
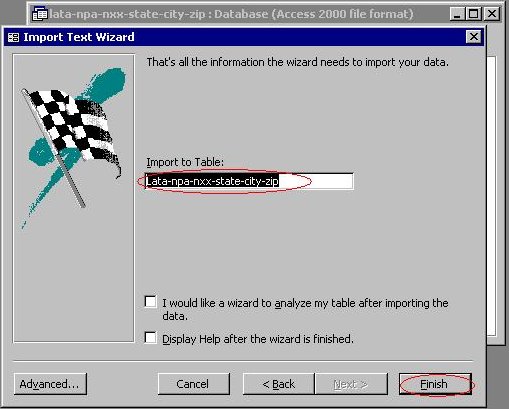
- This one's simple. Pick a descriptive name for the table. Doesn't matter much what you call it.
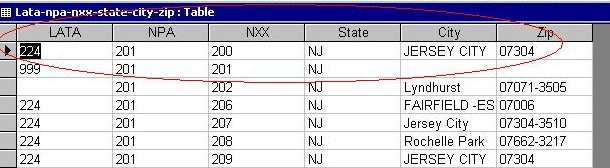
- Success!. Let's make sure the data is all there. Double click the new table.
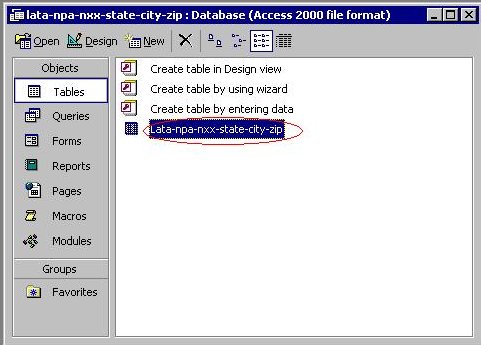
- You should see properly aligned data, with proper titles for the fields. If so, congratulations! If not, please return to the instructions and see if you missed a step.